The Carrier and Customer Booking portal
The Booking Portal allows you to manage appointments, coordinate with carriers, and streamlines operations with DataDocks customers. Whether you’re booking purchase orders, rescheduling, or adding documents and notes to appointments, the portal is designed to keep you organized and efficient.
Accessing the Portal
- Email Invitation:
- If you’ve received an email invitation, click the link and create your password. This password will be used for all future logins. Please watch this video for further guidance: Accepting Email Invitation
- Request Access via URL:
- If you’ve been provided with a URL, click the Request Access button on the webpage, complete the form, and wait for a confirmation email upon approval. Please note it is to the discretion of the facility when your request is approved, our support team cannot approve these for you. Please watch this video for further guidance: Requesting Access
- Logging In
- Once you have completed the steps to create your account, login with your email address and password.
- Forgot Password? Use the “Forgot Your Password” option to receive a reset link.
- Please watch this video for further guidance: Logging in
Tip! Whether you are signing up via the URL, or via an email invitation, there will be videos included to walk you through the process.
Dashboard
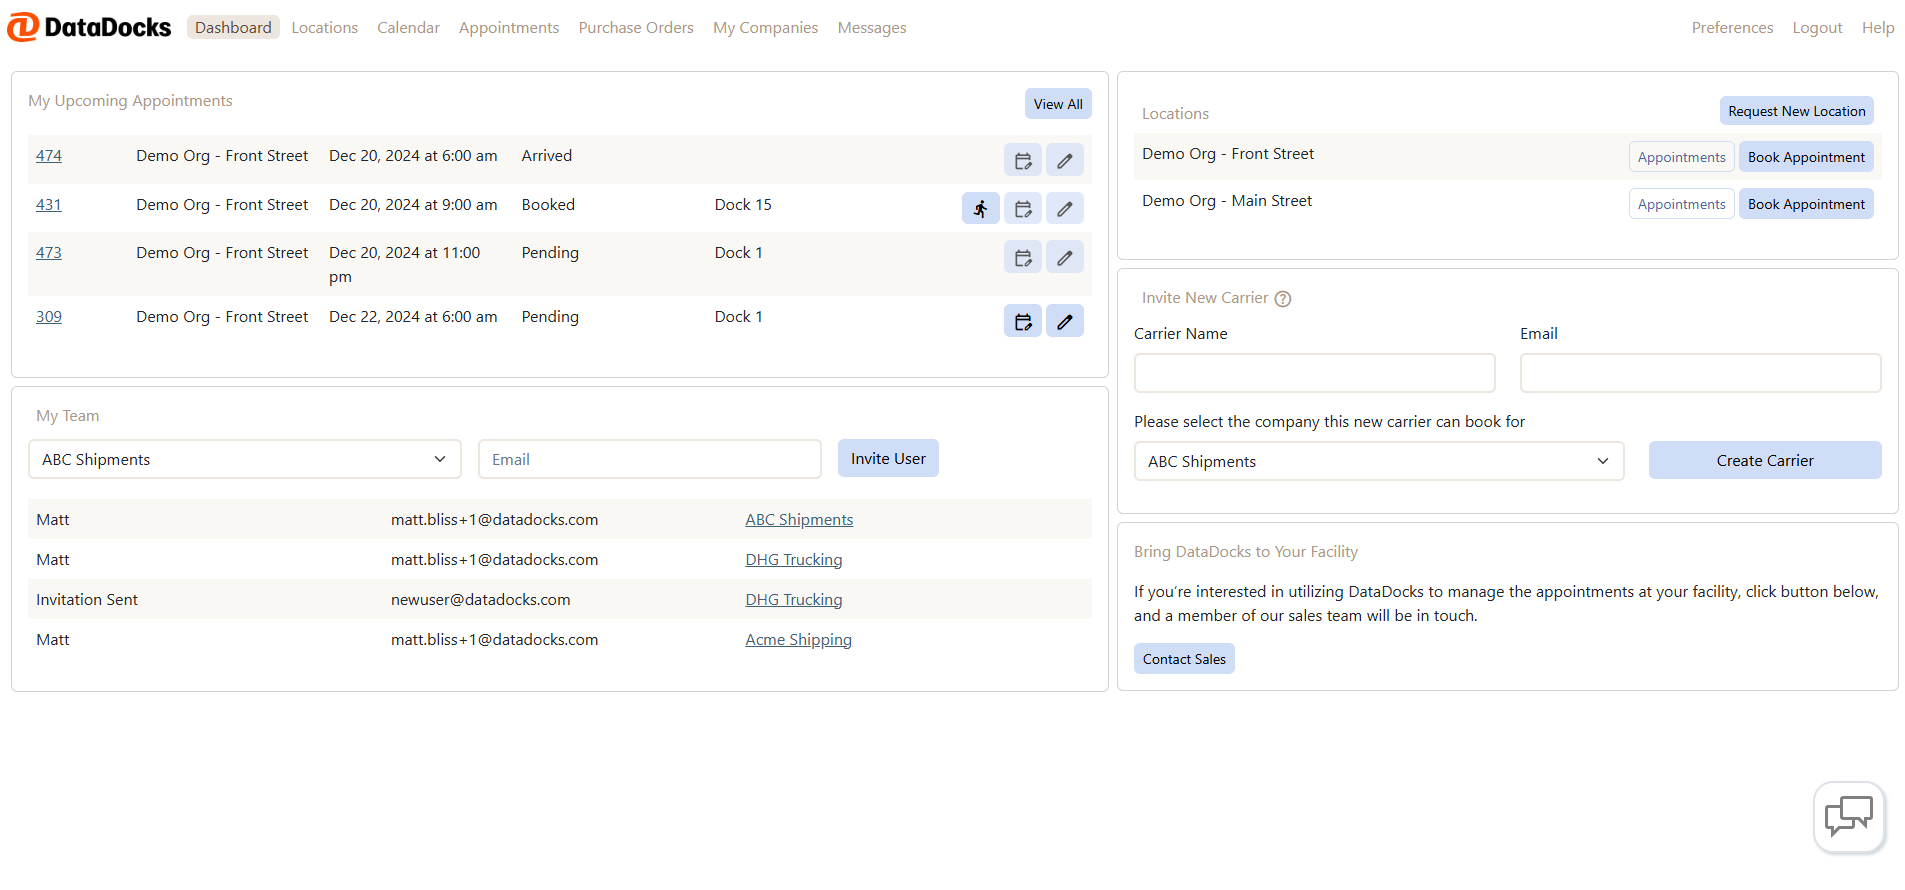
Upon logging into the portal, your landing page will be your Dashboard:
| Feature | What It Does |
|---|---|
| My Upcoming Appointments | View, edit or reschedule upcoming appointments, or let the facility know you are running late. Some options could be disabled based on parameters set by the facility. |
| Locations | Book or manage appointments at the locations you currently have access to and request new locations to schedule at. |
| My Team | Manage who has access to your company and invite new teammates via email. |
| Invite New Carrier | Invite a new carrier to DataDocks to schedule appointments on your behalf. This feature can be disabled by the facility. |
| Bring DataDocks to Your Facility | Get in touch with our sales team if you are interested in using DataDocks to manage your dock schedule. |
Appointment Screen
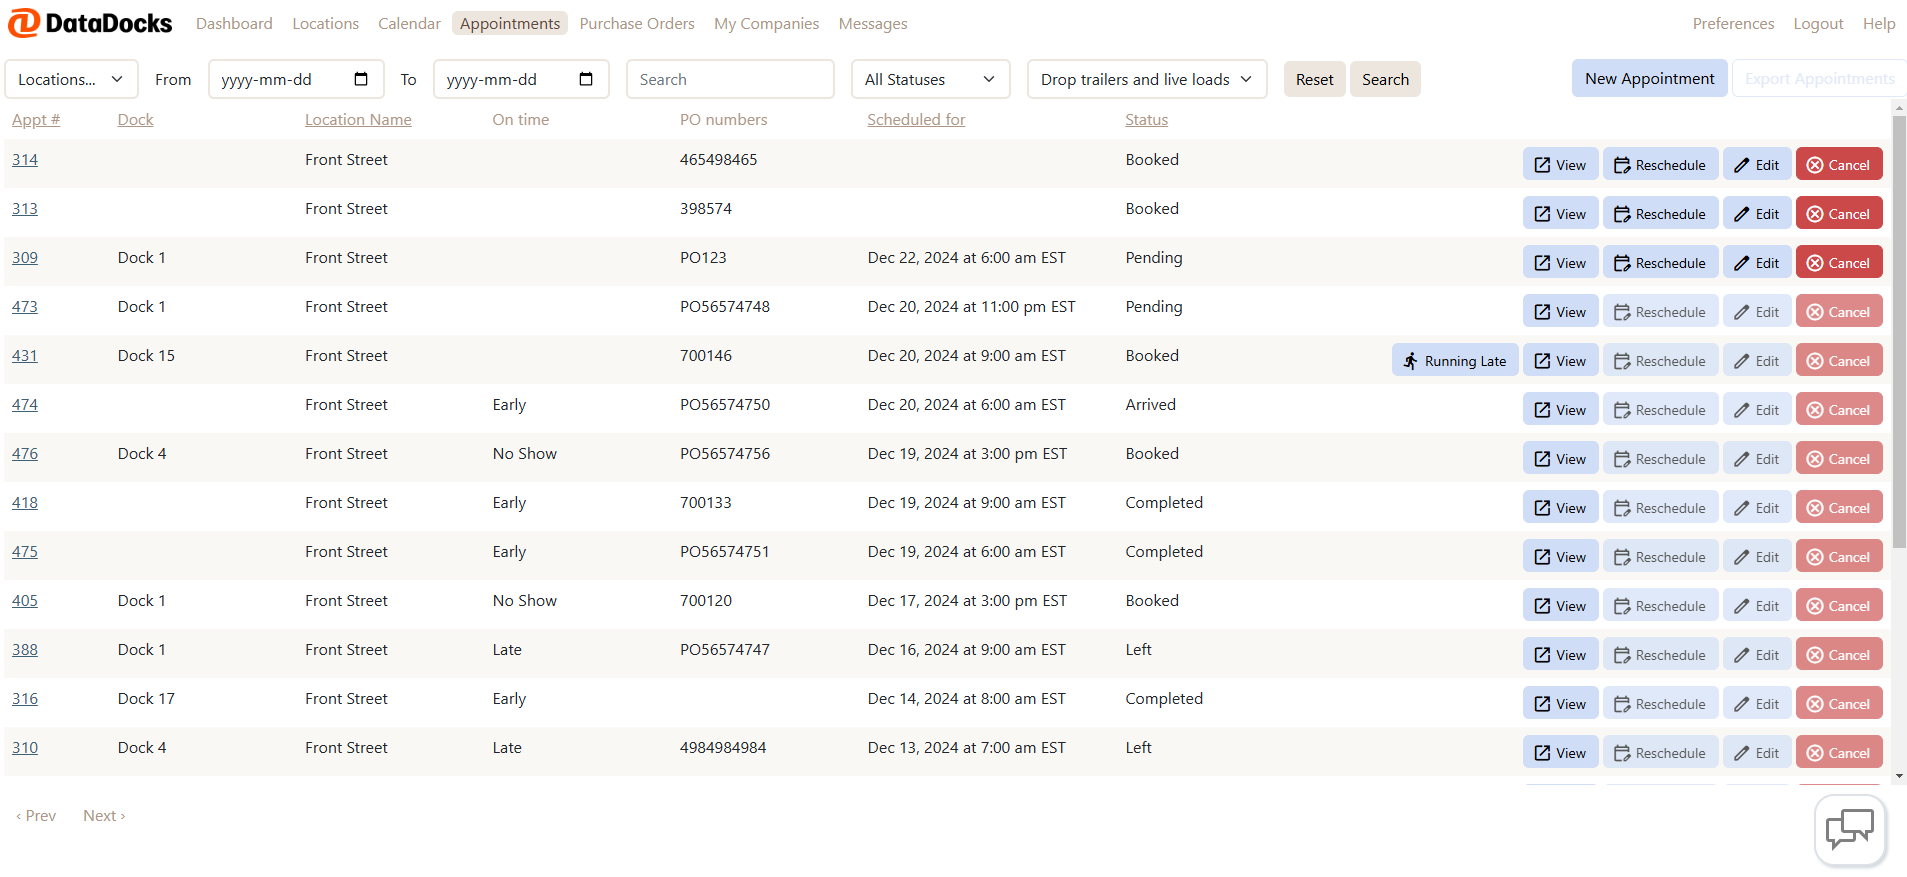
- Manage Appointments:
- View, reschedule or edit booked appointments from this screen.
- Tip! Editing, canceling or rescheduling becomes unavailable within a time frame set by the facility. If needed, use the chat feature (if enabled) or add a note via the View button.
- Creating a New Appointment:
- Click the New Appointment button and confirm the location you’re booking at. See Booking Appointments for further details.
- Editing and Viewing Appointments
- To view an appointment from the appointment page or the dashboard, click on the appointment number.
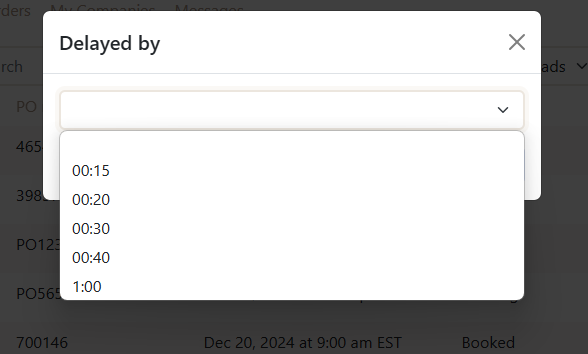
- To notify the facility that you are running late, select the “Running Late” option. A pop up will appear where you can select the amount of time you are late - this will notify the facility.
Tip! For completed appointments, those that have occurred in the past, the only option is to view the appointment and add notes and documents. You cannot cancel or re-schedule an appointment that has already occurred.
Booking Appointments
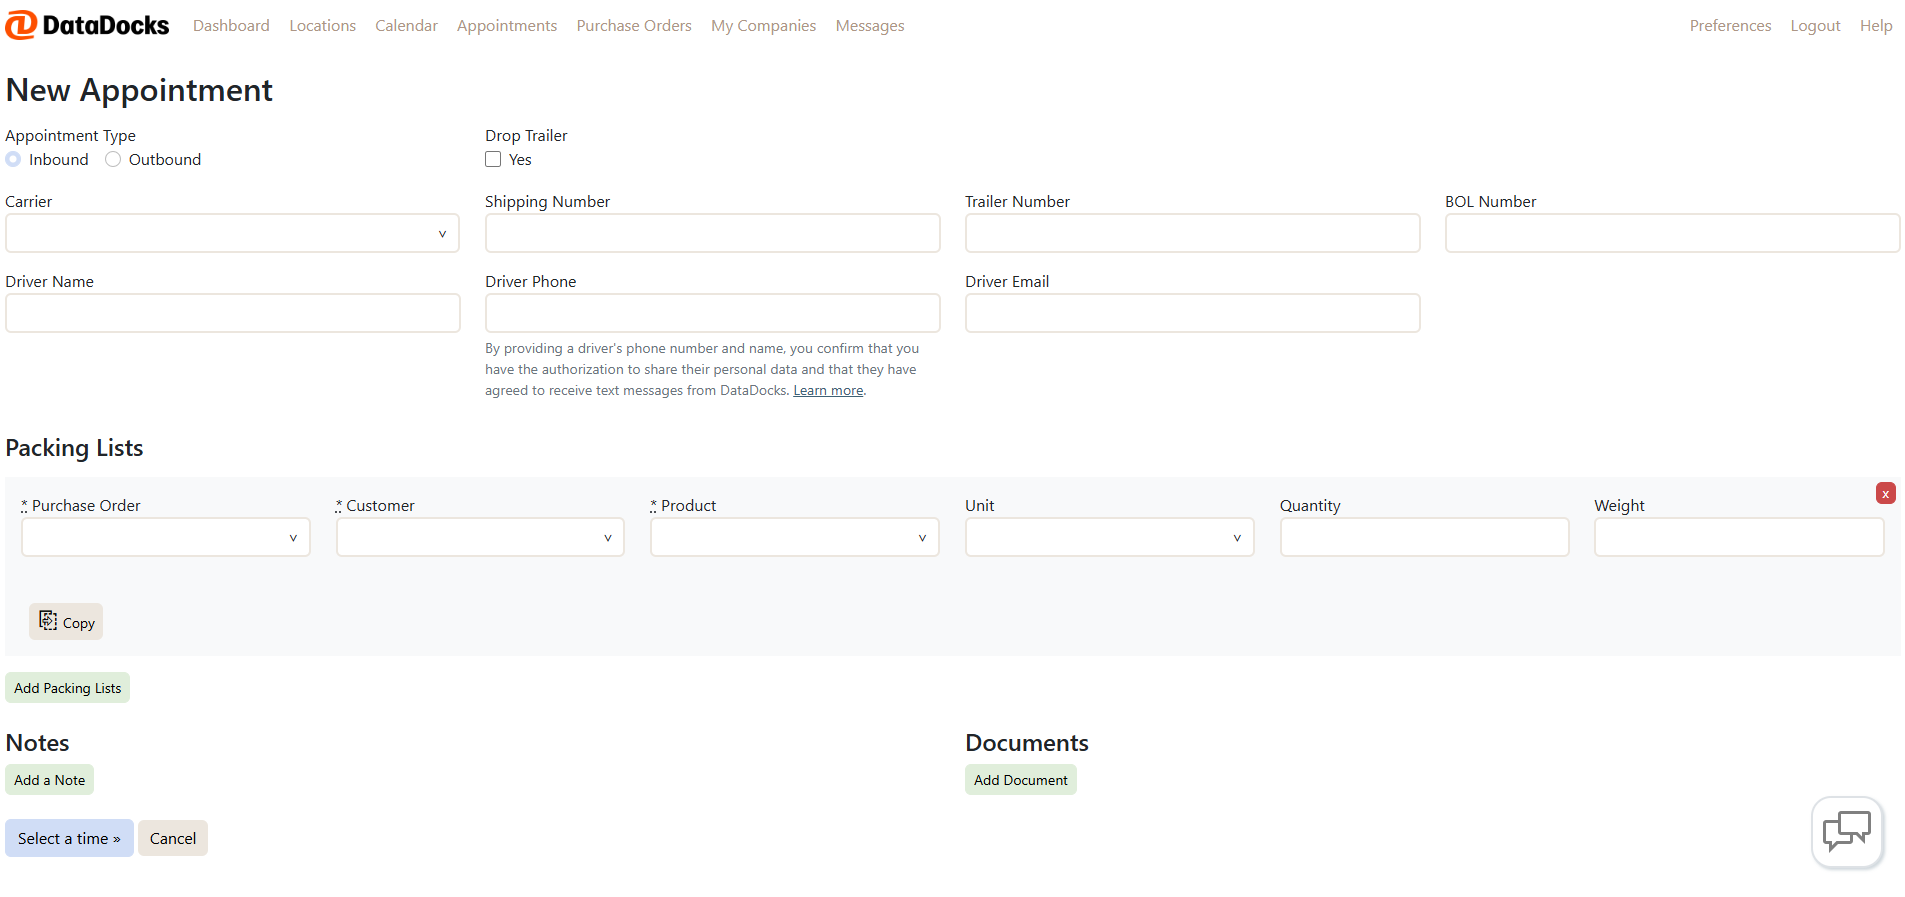
- Required Fields:
- Complete all fields marked with an asterisk (*) before proceeding. All other fields are optional and do not have to be filled.
- Tip! If the Select a Time button isn't clickable, double-check for missing fields.
- Company Name:
- Ensure your company name appears on the appointment. You cannot book an appointment for 2 companies of which you are not a user at.
- You will receive an error message with steps to resolve the issue if you do not list your company on the appointment.
- Click here to see which companies you belong to: Managing My Companies
- Error Messages
- Error messages will guide you through resolving issues if any fields are incomplete or incorrect.
- Attach Documents or Add Notes to your Appointments
- Any attached notes or documents will be available to the facility for viewing.
- Customizations
- Each location is able to customize this page to their needs, renaming fields, adding in or removing fields and requirements as necessary. Please use the messages feature (if enabled) to reach out to the location directly if you need assistance with your appointment.
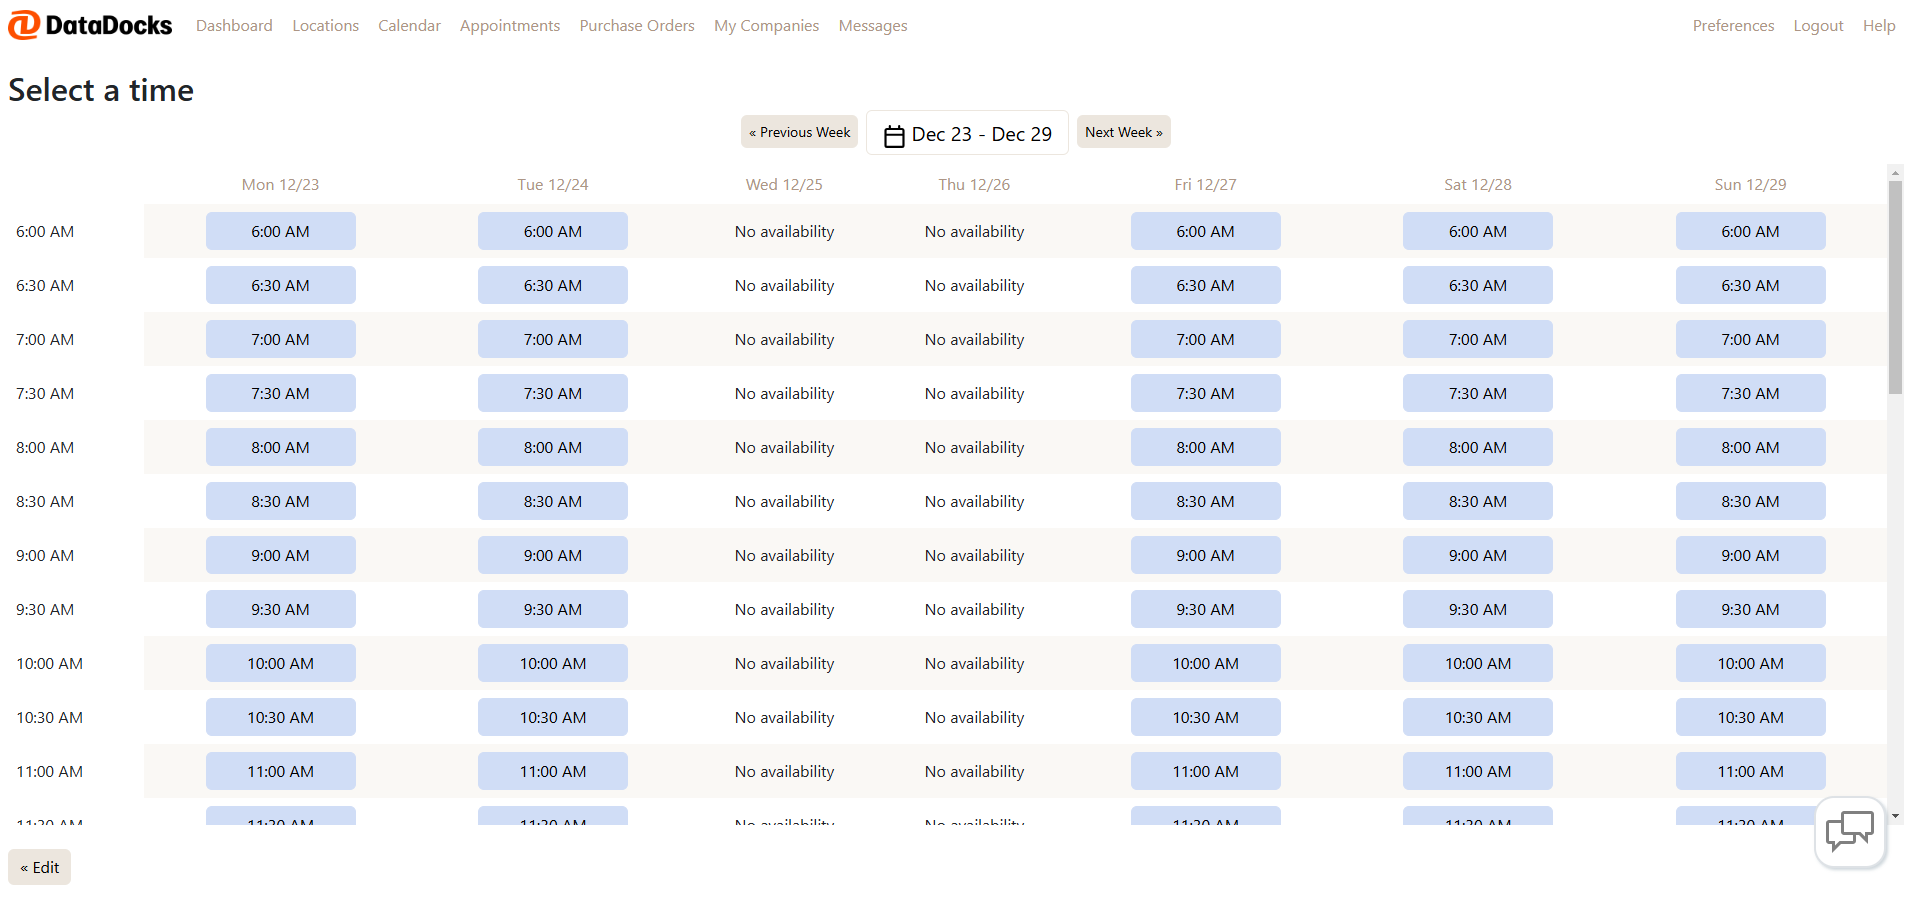
Once the form is filled out and all required fields are completed, proceed to select a time:
DataDocks will only display available times for this particular appointment.
Tip! If you see a number next to an appointment slot, this means your company already has an appointment booked at this location, for that time slot. It may be advisable to edit that current appointment instead of booking a new one.
My Companies
-
Manage Companies and Users:
- View the companies you can book on behalf of and manage your users from this section.
- Tip! The companies that have "Edit" or "Users" options listed are the companies you belong to, these are the ones that must appear on an appointment.
-
Inviting Teammates:
- Click on Users, enter their email addresses and send invites. Once accepted, teammates can book appointments. This can also be done from the Dashboard.
-
Adding Carriers
- Use the "New Carrier" option (if enabled) to allow carriers to book appointments on your behalf. This creates a link between your company and the carrier. This can also be done from the Dashboard.
Tip! Only the required fields need to be filled out here. The "Create Carrier" button will remain disabled until required fields are populated.
Purchase Orders
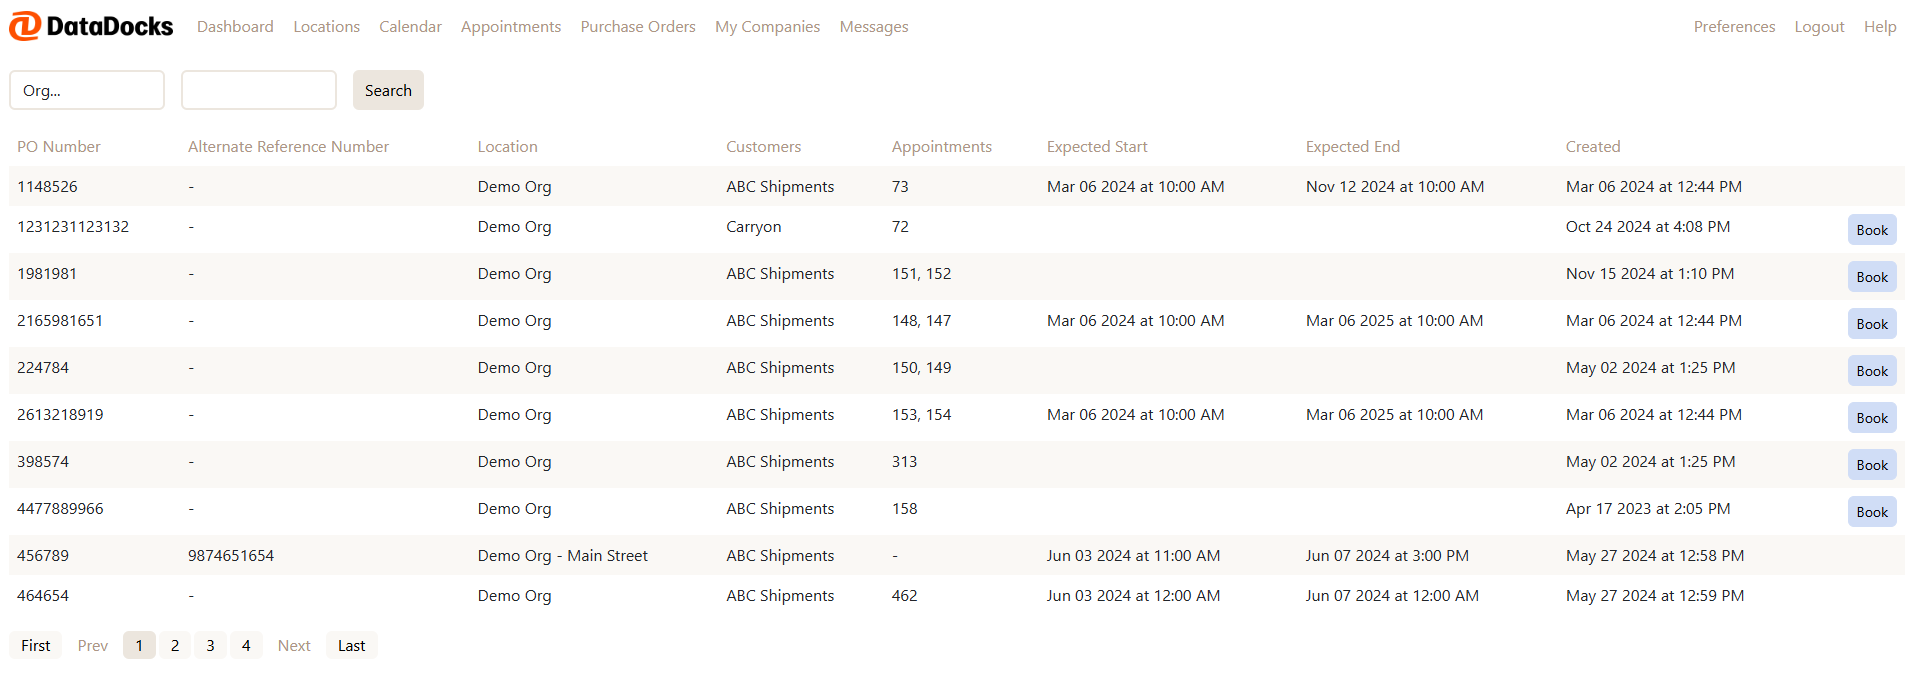
- View all purchase orders assigned to your company:
- If the appointment column is blank, this purchase order still requires booking. Clicking the "Book" button will take you directly to the appointment creation page with the Purchase Order Details pre-populated.
- If there is no "Book" button, this means either the Purchase Order has expired (see Expected Start and End Columns) or the Purchase Order has already been booked onto an appointment (See Appointments Column).
Preferences
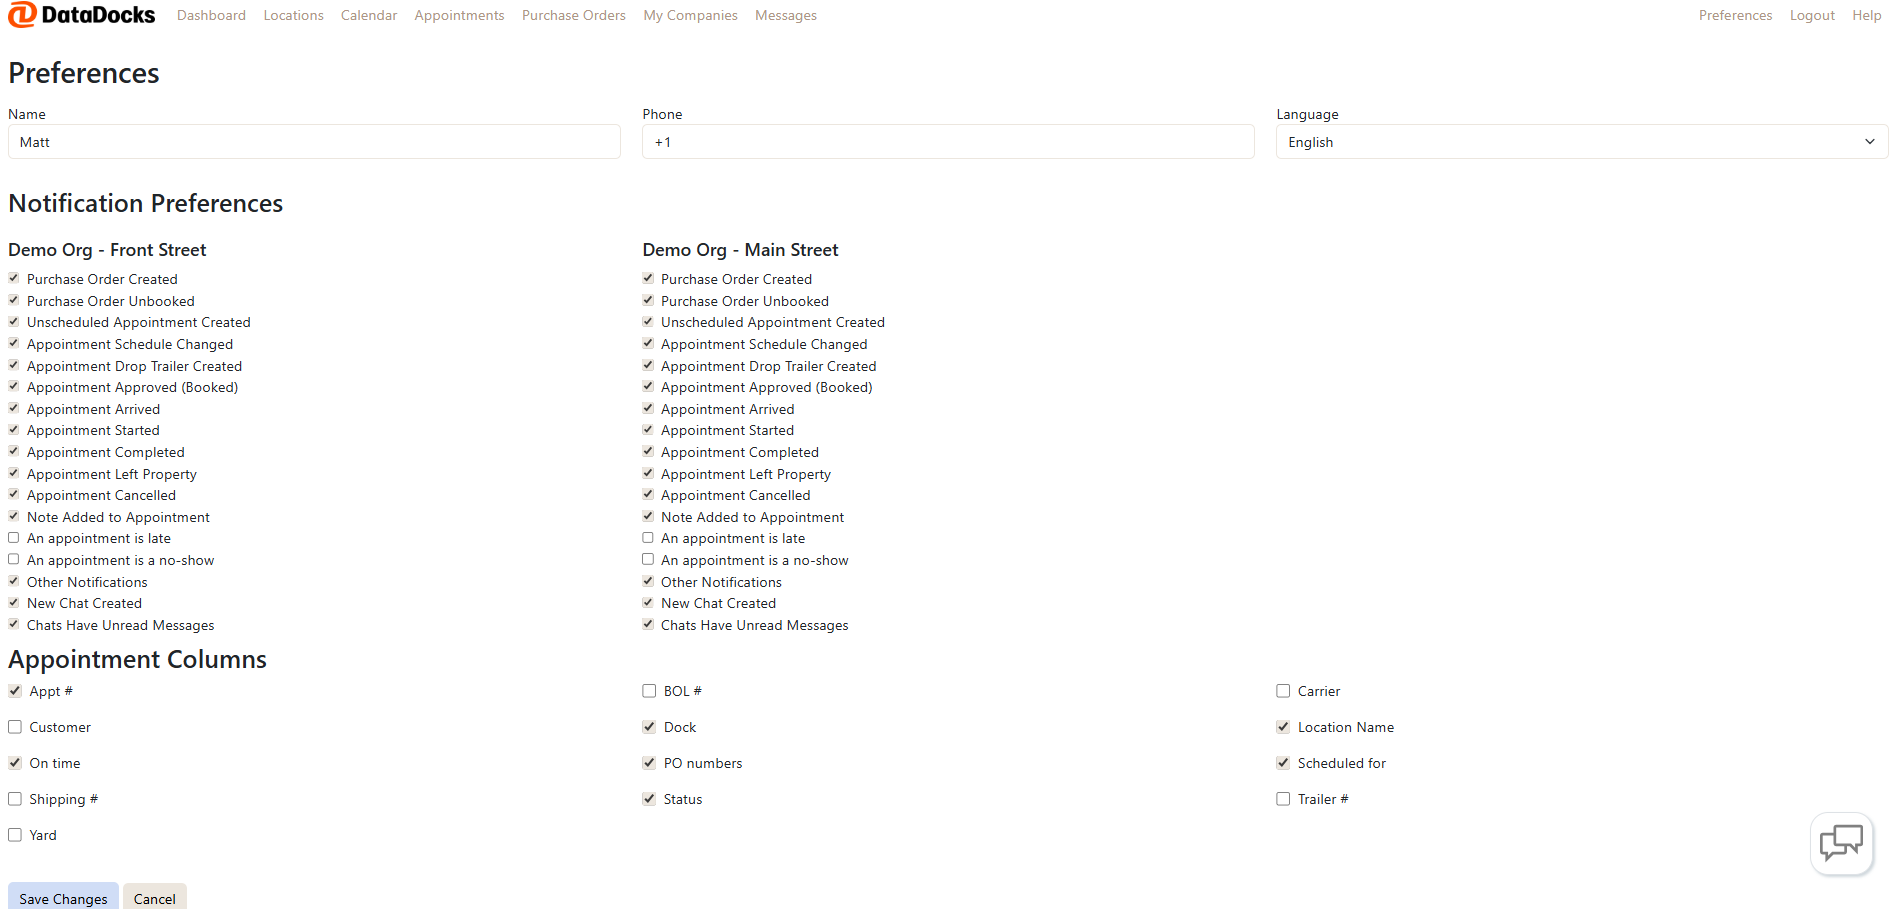
- Notifications:
- Control which notifications you receive for appointments and changes
- Column Customization:
- Adjust which columns appear on your main appointment page for a tailored view.
- Account Updates:
- Update your password or email address as needed.
Messaging
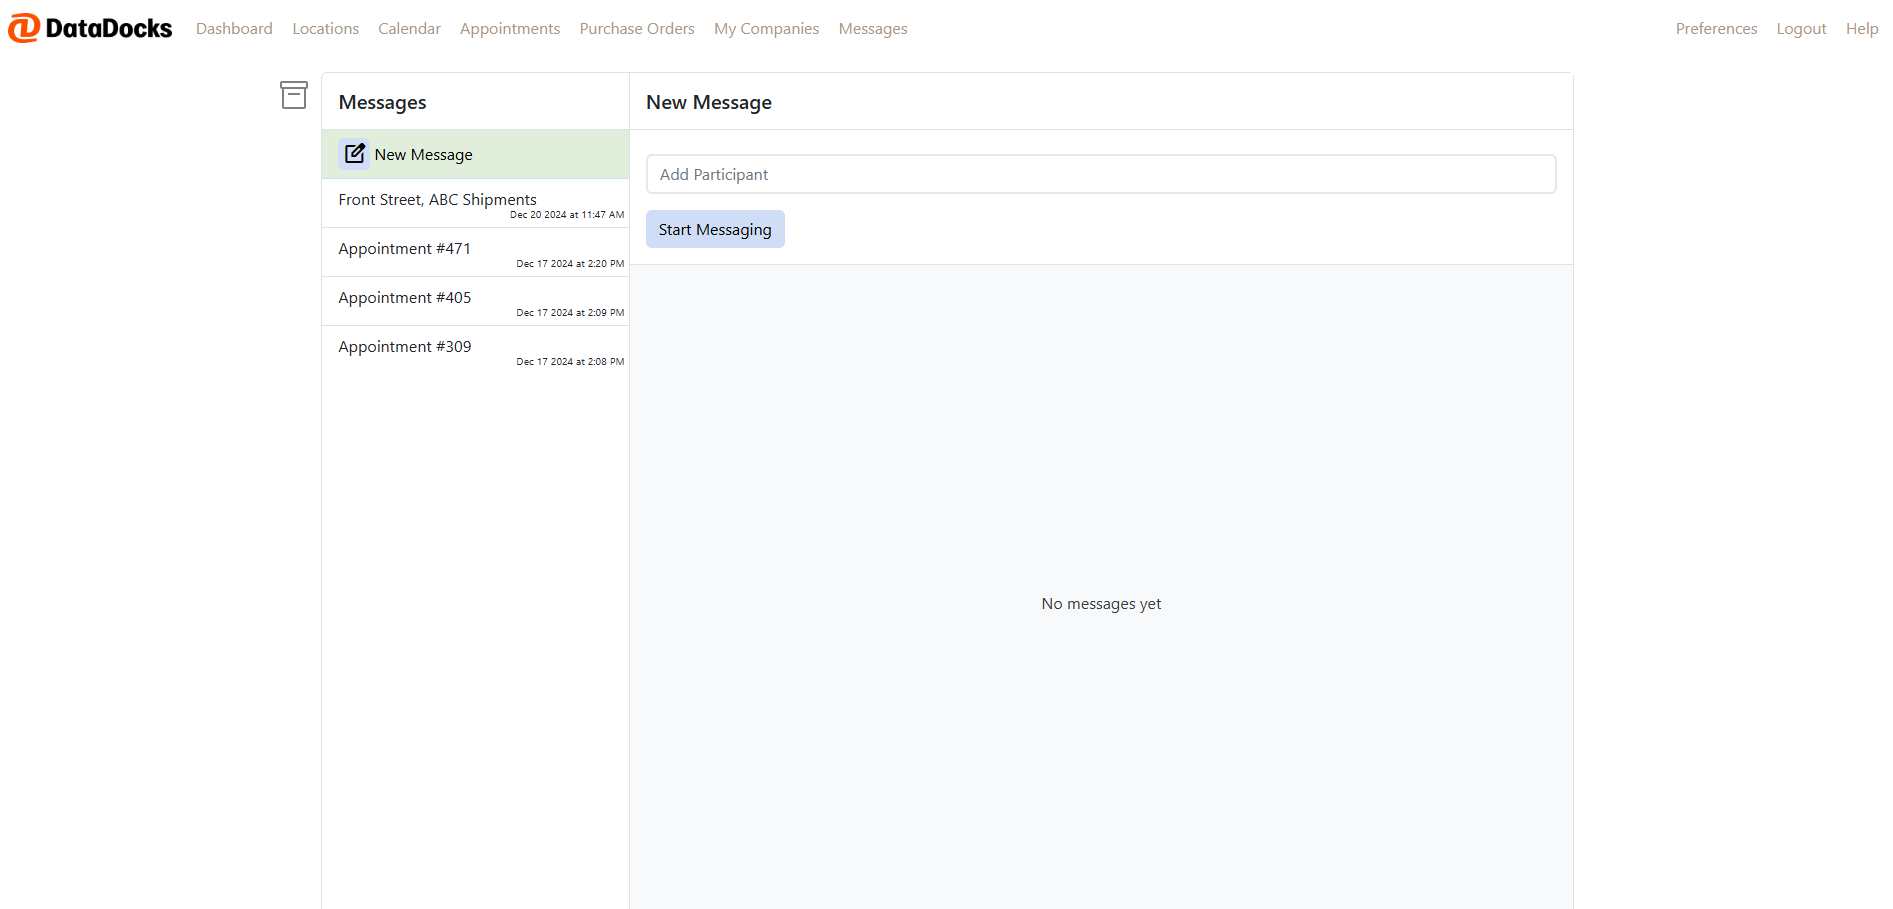
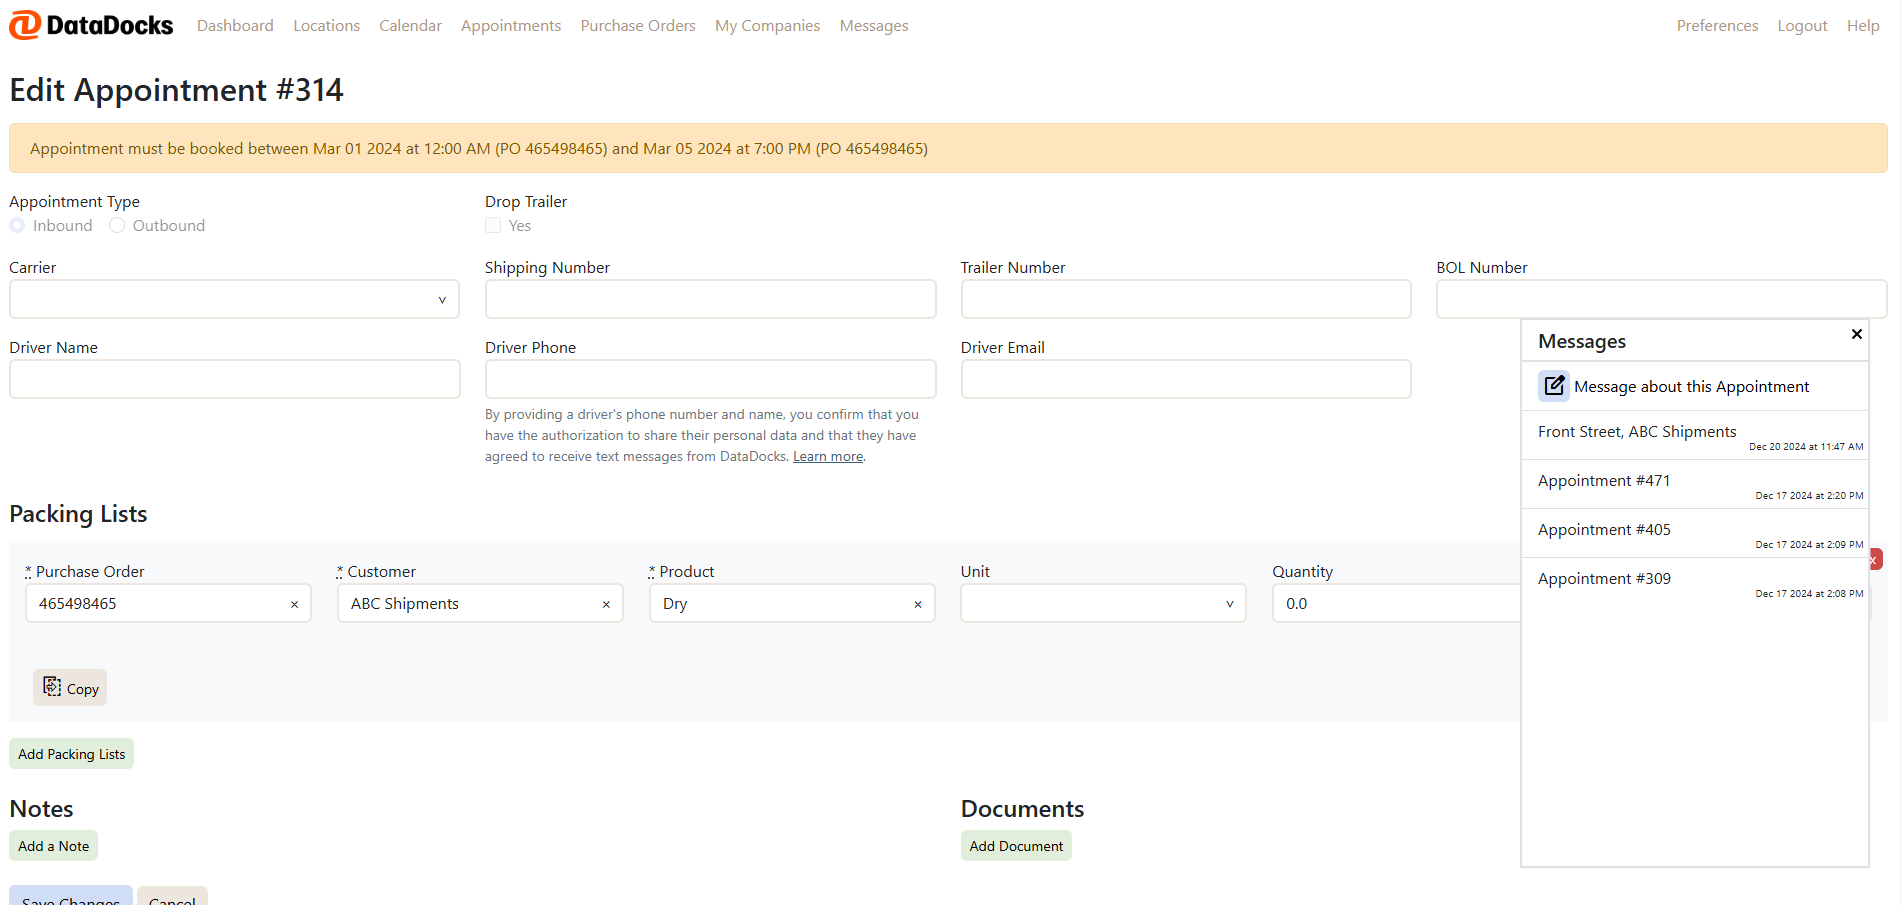
For quick communication to the facility, utilize the messaging feature under the option “Messages”
- Click Add Participant to select who you'd like to message, then click Start Messaging
- Type your message and hit send. Messages will include read receipts so you can see when your message has been received.
- Email alerts will be sent for new conversations and messages that have been unread for 2 hours.
- Alternatively, if you are viewing an appointment and use the chat bubble, you can message about that appointment directly.

